This article describes how to use Microsoft SQL Server Management Studio with your Windows Hosting account.
CREATING A MICROSOFT SQL SERVER ACCOUNT
Before you can use SQL Server Management Studio, you must first create a SQL Server account in Plesk. To do this, follow these steps:
- Log in to Plesk.
- In the left sidebar, click Databases.
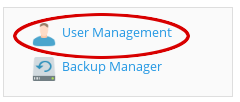
- In the right sidebar, click User Management:
-
On the Database Users page, click :

1. On the Adding Database User page, in the Database server list box, select the SQL cluster server for your account:

5. In the Database user name text box, type a username.
6. In the New password and Confirm password text boxes, type a password for the new user.
7. In the Database list box, select Any.
8. Click .
ACCESSING YOUR MICROSOFT SQL SERVER MANAGMENT STUDIO ACCOUNT
After you create a Microsoft SQL Server account in Plesk, you are ready to connect to it using SQL Server Management Studio. To do this, follow these steps:
- Start Microsoft SQL Server Management Studio.
- On the menu, click . The Connect to Server dialog box appears:
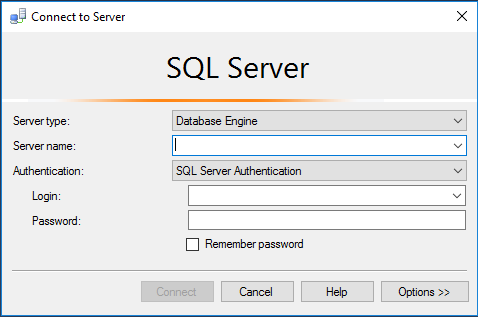
- In the Server type list box, select Database Engine.
- In the Server name text box, type the name of the SQL cluster server for your account.
- In the Authentication list box, select SQL Server Authentication.
- In the Login text box, type the Microsoft SQL Server username you created in the previous procedure.
-
In the Password text box, type the password for the Microsoft SQL Server username you created in the previous procedure.
If you do not want to re-type the password every time you connect to the server, select the Remember password check box. - Click . After a few seconds SQL Server Management Studio connects to the server.
- Click the plus (+) sign next to Databases to expand the view, and then click the plus (+) sign next to your username to view the objects in your account.


